

Friday, December 4, 2015
Reindeer Die cards
I got this new reindeer and word dies. They cut very nice. I got them from Tuesday Morning but I don't remember the brand. Here are the cards I did with them.

Simple Card for first person leaving
My company is closing the local office and I will be moving to another location for a few years. The local office is open for another year but because of my position, I will have to go sooner. Here is the card I did for the first person who found a job.

Simple double stamp of the Lovely as a Tree Stampin Up set with an embossed background. Isn't great how a beautiful stamp doesn't need a much to create a beautiful card.

Simple double stamp of the Lovely as a Tree Stampin Up set with an embossed background. Isn't great how a beautiful stamp doesn't need a much to create a beautiful card.
Sunday, November 1, 2015
Effy's lesson after Dyan's lesson.
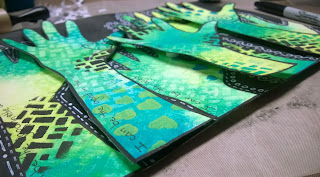
Effy took Dyan's lesson other places. I went other places with the lesson and this is what I came up with. I copied my own hand. Then I "fixed it" Then I reduced the size. Then I fixed it some more. Then I cut it out to use as a stencil. I created two pages of wonderful backgrounds.
Then I stenciled the hands.


Then I stenciled the hands.


I added the doodles and layered the hands. The words on it say "I can be the good in the world." When I see the hands, I think "Me", "Me" - I can be the good! Hope it makes you think, "Me too, I want to help make this a better world."

I will name my first piece. I will call it "Me too"


Have a creative day!
Dyan Reaveley lesson
In my Radiant 2 class. I did this project after Dyan's lesson.

It is not my favorite but it is a start.
Have a creative day.
Sunday, October 25, 2015
Second project for Radiant II class

Here is the second project for my Radiant class. I worked until 3 AM on this and thought I was done. This morning, I added shading and like it much more. It is surprising how much shading can make a difference.
Here are a couple pictures before shading.


See what a different it makes. I used a bunch of different acrylic paints including metallic. I also used shimmer and iridescent sprays. Shading in the end was done with Copics. I figured anything goes!
I kept the theme of this the same as the first one, evolving through the passage of time. This time, I used the seasons rather than age.
Because of the metalic and iridescent paints, it is hard to show the details. Here are some closeup and angles to help.


I am learning about myself. It is a fun adventure.
Have a creative day.
Wine and Paint party
3 friends and I got together on Friday night for a vine and paint party. I didn't drink wine but had a nice time. We didn't have an instructor and did out own things but I thought it all came out pretty wonderful.


We all worked in acrylics and mostly just craft paints. This is mine. I was pretty happy considering there wasn't anyone to teach us.
Tuesday, October 20, 2015
Radiant II Lesson 1
My first class in the Radiant II class is by Felicia Borges, She gave a lot of ideas but the one I ran with was three faces with 2 sets of eyes. I am a beginner drawer so it meant a lot to me to be able to do faces. I drew the faces in Michigan on a business trip. A new friend in my class, taught me some new things as well as watching lots of videos on You Tube.

I wish I had some different paints and supplies but I made due with what I had. Effy showed a collage technique for the background in part 2 of lesson one. I used the idea this.


I wish I had some different paints and supplies but I made due with what I had. Effy showed a collage technique for the background in part 2 of lesson one. I used the idea this.

The clock is a Tim Holtz die.

Thursday, October 15, 2015
Mini One Sheet Wonder
I also did these several months ago. You create a 4.25 by 5.5 designer paper and cut it to create 3 cards. I used the Stampin Up butterfly stamps.


If you make a set, let me know
Have a creative day!
Watercolor Block Technique

I did this several months ago. It is was a pretty easy technique with a cool result.
Take a acrylic block and color on it with markers. Then spritz it with water.
Next use the block as a stop and press it on your paper. Solid silhouette stamped images stamped in black look great on this background.
Wednesday, October 14, 2015
Cards from Midnight Madness
Below are the cards I did for Midnight Madness. Midnight madness is a yearly craft night my church does. I have offered Christmas cards at it for several years. These are the ones from this year.


This one is done with new Stampin Up dies from the holiday catalog and the star border punch, also from Stampin Up .

The stamp and dies from this card are also from Stampin Up and retired, I think.

More Stampin Up here. This is a stamp and die set. I think yo ucan still get it from Stampin Up.

It is a Stampin Up year! More cards with Stampin Up stamps.


Finally, another Stampin Up set. I love this set. Beautiful!!
The pattern papers are purchased at Tuesday Morning. They also learned to do lined envelopes to go with their cards.
Have a creative day!
The eye

I drew this on a coloring app on my phone. Just my finger as a pencil ...and I have stubby, chunky fingers. I was happy with what I got and think it shows some of that I have learned so far.
1. You rarely see the whole iris/pupil of an eye. You lid covers it partly. This could have been more but not bad.
2. There needs to be a reflective white spot in the eye or it doesn't look alive.
3. There are small lines above and below the lid and that is where the lasses come out.
4. The eye ball does not fill the whole socket.
5. Studying pictures of eyes helps.
Of course I have a lot more to learn but I am pleased with my start.
Have a creative day.
Learning to draw
I am sorry for those how are here at my blog for card making, I am going to include some other things...but I will also catch up on some cards. I have been sharing things on Facebook more since there is more exposure but I have had this blog a log time and won't be giving it up.:)
I don't think I can draw well at all but I have been watching YouTube videos to learn. I also had someone taking one of my classes from work that gave me some pointers. My first lesson in my online class was to do morphing faces with 2 sets of eyes being the eyes for three people. I haven't completed it yet but here is my sketch and I am so proud!

I don't think I can draw well at all but I have been watching YouTube videos to learn. I also had someone taking one of my classes from work that gave me some pointers. My first lesson in my online class was to do morphing faces with 2 sets of eyes being the eyes for three people. I haven't completed it yet but here is my sketch and I am so proud!

There are words in the hair for the different ages of woman. I am planning on painting the hair in pinks and purples. I hope painting this doesn't wreck it. I am a little worried.
The class is with Effy Wild and called Radiant II
Have a creative day!
Art Journal
I am taking an online class for art journaling. I am excited. I like learning more things but I also think I can apply some of the techniques to card making and other things. The class is with Effy Wild and is called Radiant II. http://effywild.ning.com/. 15 artist will present lessons and Effy will also give her takes on the lessons.
To start, she taught an Effydori. I made a lot of chances in the process as I went but I love my book. It isn't as wild as some of the others but I decided that I love the ocean so I would use it as a theme.

This is the completed book. It has a foam base with canvas on it. I covered it all in gesso and paints. I used stamps from I Brake for Stamps for the shells. These are my all time favorite stamps.
Here is a picture of the cover before I added the elastics. I manipulated it alot. Adding and removing paint. It has a lot more sparkle than the picture shows.

I loved how the inside turned out. It is fun foam covered in gesso and Dylusions ink sprays. I also added some iridescent powders. You might see slight images of stamps I pressed into it but it is very subtle.

Then I used my Cropidile punch to put holes in the cover so I could add elastics and bling to my book. The sheets in the book and bundles of watercolor paper, folded and sewn. These fit into the elastics but can come out to paint and get messy without messing with your whole book. I had lots of bling to choose for on my books since I also do jewelry sometimes.


So ready to learn new things to add to it!
Have a creative day!
Sunday, September 20, 2015
Boy card
Here is another card for my class . I got the stamp at Hobby Lobby on my trip to Utah. Still haven't made it to the new one in Idaho Falls. Wish we had a good craft store in Pocatello.
This stamp is by Julie Nutting, called Toby. I used watercolor pencils to color it. The paper was an old set I got from Tuesday Morning.

This stamp is by Julie Nutting, called Toby. I used watercolor pencils to color it. The paper was an old set I got from Tuesday Morning.

Sheltering Tree Card
Card class this week! I am doing classes on Thursday's now so I can help with my daughters family on weekends. My daughter is working on duel masters degrees in Bio-engineering and a MBA with her two young children...and her husband is still in Illinois finishing his masters. Spending as much time as I can to help her.
Here is the first card for class. It is done with the Sheltering Tree stamp set from Stampin Up. I love this set. Lots to do with it. I was inspired from this web site: http://www.mystampinhaven.com.au/focusing-the-spotlight/

Have a creative day!
Here is the first card for class. It is done with the Sheltering Tree stamp set from Stampin Up. I love this set. Lots to do with it. I was inspired from this web site: http://www.mystampinhaven.com.au/focusing-the-spotlight/

Have a creative day!
Wednesday, May 13, 2015
Irises in bloom at my house
I won't get to see all my irises bloom this year. They are just starting and very pretty. God's art is the best of all!


Necklace
Last night I was anxious about my trip and leaving my family. I am excited but nervous too. I stayed up very very late last night and made this necklace. The stones are redline marble. I got them from Fire Mountain Gems. I watch for dutch auctions on their site and have quite a collection of stones and beads.


Have a creative day!
Friday, May 8, 2015
More Sheltering Trees
I made a few more seasons of cards with the Sheltering Tree stamps. Lovely stamp set!


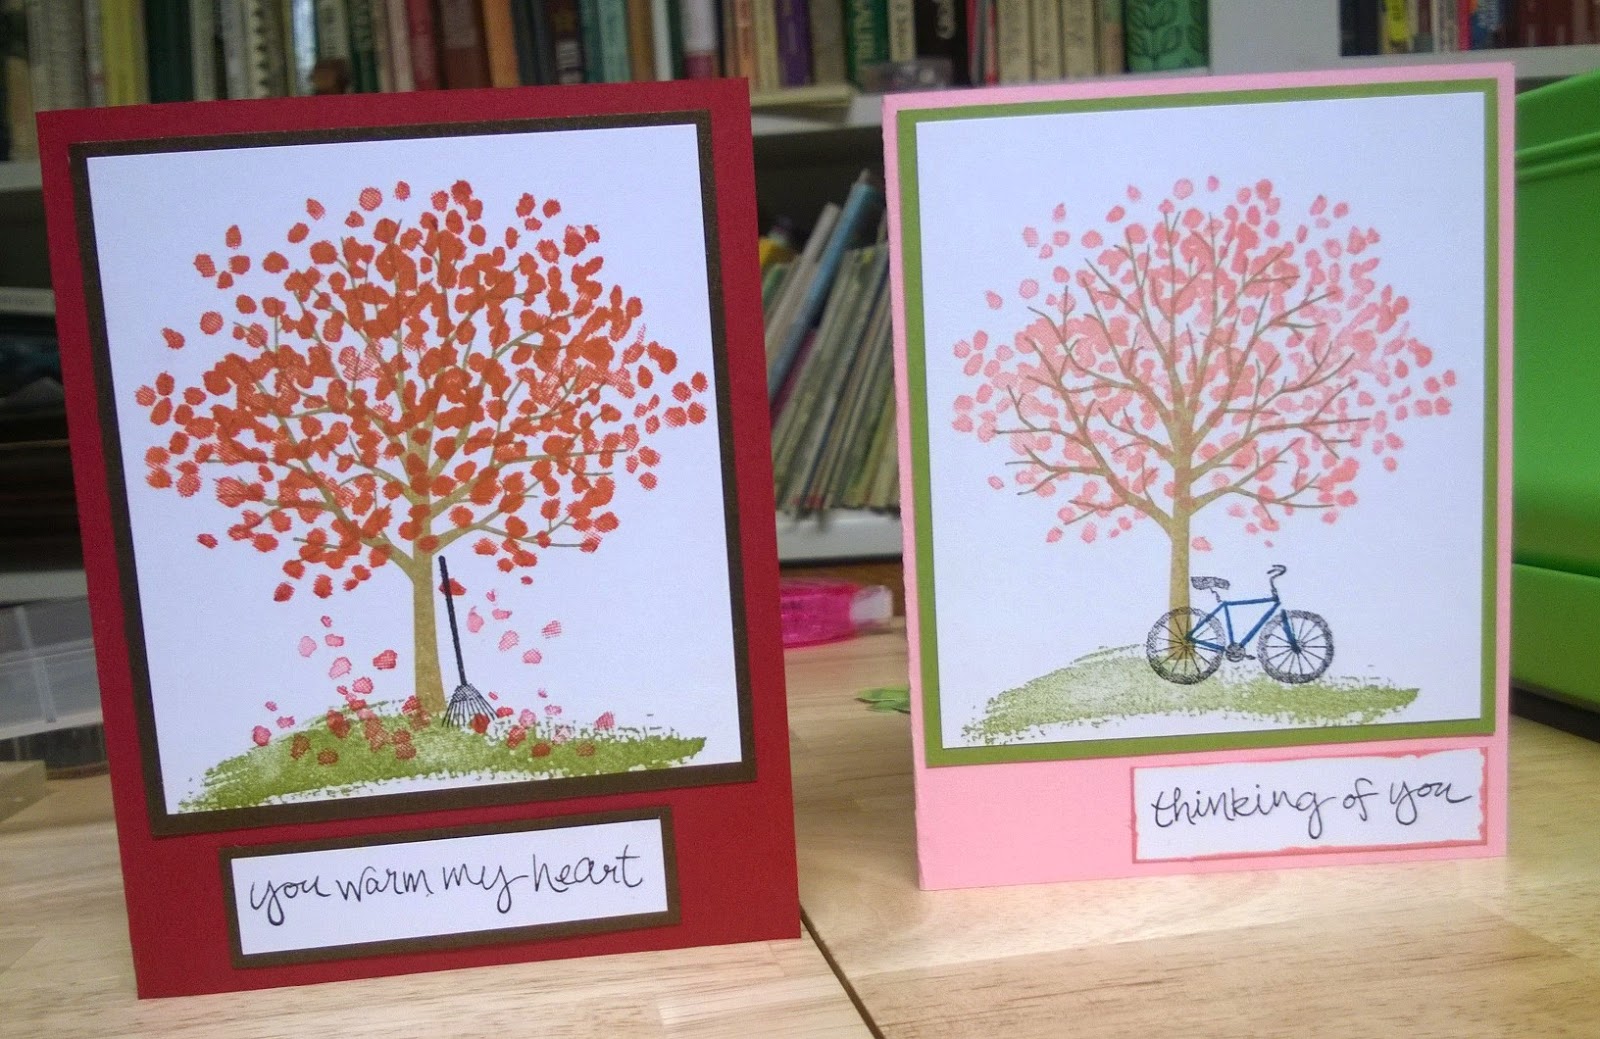
So here are the fall and spring versions.

So simple to put together the layers. I used all Stampin Up inks. The one above has some fabulous metallic paper behind it. Can't really see it in the pictures.

And finally the spring version.
Have a creative day!
Thursday, May 7, 2015
Sheltering Tree Card
The Sheltering Tree stamp set from Stampin Up is pretty amazing. I love the effect and can't wait to make the tree for spring, fall, and winter.


I used Old Olive and Baked Brown Sugar for the inks on the tree. Both Stampin Up inks. The words and swing were Archival Ink by Ranger. Papers are Old Olive by Stampin Up and the base is whatever came out of the stack of card bases.
If you have the set, give it a try. Pretty amazing.
Have a creative day!
Garage Sale Treasures
The other day I went to a garage sale. I love to look for craft supplies at garage sales. We actually didn't have much time and just stopped at one while running errands. I found a pile of reed for making baskets. I liked the colors and although I haven't made a basket for years, ask what it wouls cost. "Three dollars" she said. Okay, not much. Might be fun to try again.
As I lifted the pile from the basket she had it displayed in, I found a deer antler had been used to create a rim for a basket. I have never done anything like that. How fun!
I have late church this year and don't attend meeting until 1pm so Sunday morning I got up and decided to make a basket. Pretty brave for a woman who hasn't made a basket in years and then only one, in a class at the fiber arts fair. I did search the internet and didn't find anything really to help.
So before church that morning, I had created this!
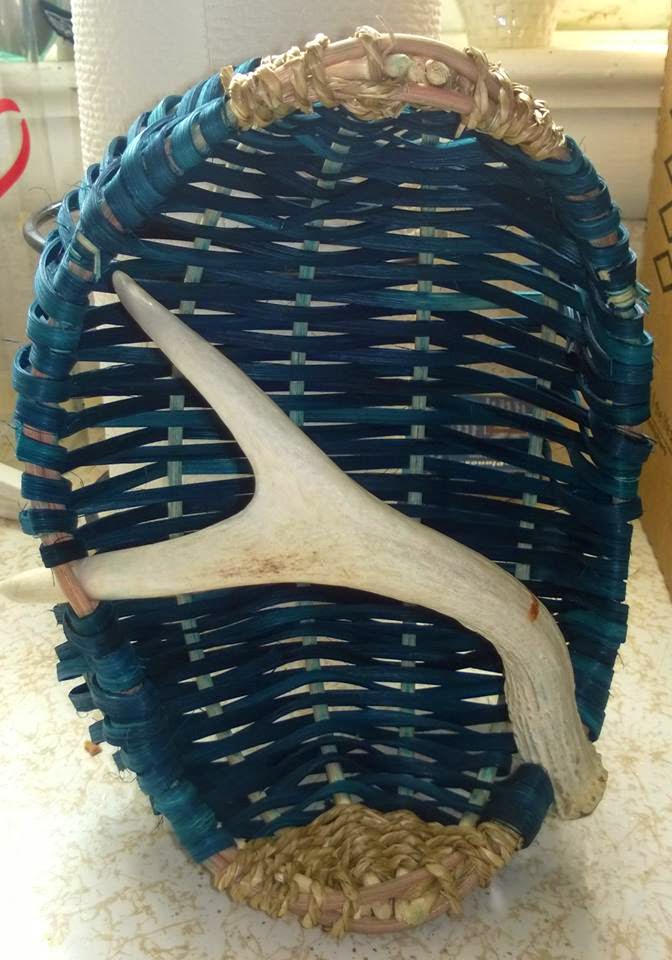

Certainly not perfect but I was so pleased with myself. People are always so amazed at what I do. This time I amazed myself!
I think I will hang it on the wall!
Have a creative day!
Second Wedding card
Here is a second wedding card I did. The floral heart die by Sizzix and called Heart Card Front. The words are from the same Stampin Up set as the other one.


I altered this card. I was told by someone they liked the other one better and I was hoping this would make them like this one more. Haven't decided if it does or doesn't.

Which do you like better?
Have a Creative Day!
Wednesday, May 6, 2015
Wedding Card for trip to Peru
Next week, I leave for 2 weeks in Peru with my mother visiting some relatives. She has first cousins there that she only meet for the first time last year. We are going for a wedding so I have been working on some wedding cards. I was pleased with this one. The hardest part is finding two dies ot punches that work for the hearts. I used a Sizzix die. I am sure it is very old and probably not made any more.

The words and flower embossing folder are by Stampin Up.
I might have to make more of these.
Have a creative day!
Tuesday, May 5, 2015
Past Flower class
Here are some cards from a prior card class. The theme was flowers. There are three of the cards. My daughter provided the fourth card for class. She was visiting from Illinois.


I didn't know I would like this set of stamps from Stampin Up so much. Love how they turn out! this is Flower Patch and it has a coordinating die.

I did this with a Silhouette file. So simple to just cut and glue together.

This is a flower with the Lotus Blossom set from stampin up. I loved how the flowers look hand painted.
Subscribe to:
Posts (Atom)