Wednesday, December 26, 2012

Merry Christmas

I hope everyone had a wonderful Christmas with people they love. I wish there was more peace and joy in the world. Real happiness that comes from within.

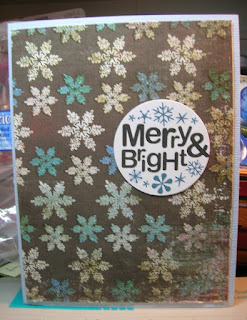
Here are some cards I did over the holidays.  They were requests from a friend at work. She asked for bigger cards that my usual so these are 5 x 7

The die of the lamp is by Sizzix.  The background is also a Sizzix embossing folder. My friend Maria got it earlier this holiday season and share some die cuts but I was able to get my own at JoAnn's in the clearance area.  I printing the words using the Stampin Up digital program, My Design Studio. 


The paper came from a pad, I love the nontraditional colors. I got the pad after Christmas last year and haven't seen it again. I think I got it at JoAnns. The stamp of a poinsettia is by Stampin Up. 

This is a digital print set from CraftUPrint. com.


Tuesday, December 18, 2012

55 Christmas Cards for the Veteran's Home

I organized a service project at my office for the locale Veteran's Home. We did 55 Cards and they have hundreds of signatures. They are great ideas for simple cards. Some are the maker's first time at making a card.  Here are a few of my favorites:


This card was hand drawn by Brent Chase.  He borrowed someone's hairspray to seal it. Isn't it wonderful?!


The words on this were die cuts I got long ago from a friend on JustCards. 

Tuesday, November 6, 2012

More Midnight Madness - Menu

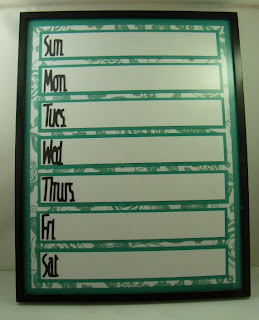
This was an easy project. I had cut out lots of different colors so people could pick something to match their kitchens. You write the menu with a dry erase maker.  I cut out the days of the week with my Cricut.


It is in a 8 1/2 by 11 frame.

Sunday, November 4, 2012

5 cards at Midnight Madness

Another paper craft I created for midnight madness was 5 Easy Christmas cards.  Here they are

This one is pretty music paper, a Stampin Up stamp, and a EK ornament punch


This one is pretty paper, an EK punch and a stamp from I Brake For Stamps. The stamp is called Manger. It is available as a digital stamp and a rubber stamp.


This is done with pretty paper and Tim Holtz dies. The words some out and are interchangeable. 

This one is just pretty paper again and the words are from Stampin Up 

This one is done with a die I got at I Brake for Stamps. The background is done with s Sizzix folder that I got at JoAnn Fabrics. It is colored with markers and blender pens/inks.

Hope they give you ideas. 


Family Frame

This was the most popular project at Midnight Madness this year. I saw something like it on Pinterest but them developed my own thing because nothing had directions and most were restricted to Stampin Up supplies.


This is a 8 1/2 by 11 frame. The red paper is Cherry Cobbler from Stampin Up. The rest is just papers I found.  The paper behind the "I" is a plain paper with the red design stamped. 

  • Background paper is 81/2 by 11
  • Black squares are 2 1/2 by 2 1/2
  • patterned paper squares are 2 1/4 by 2 1/4
  • The letters were cut with the Classic Font Cricut cartridge.
  • The little vines are separate from the letters and done with the pieces from an EK vine border punch
  • The bird and butterflies are done with Stampin Up products. Punch for the bird and embosslet for the butterflies.
  • Other shapes are dies by Spellbinders. 
  • The "Together Forever" stamp is Stampin Up  

I cut out most of the pieces for 53 of these. CRAZY!! I cut everything but the vines and bird punch for 53!! Well, I think everyone loved it which is really nice.  Sadly, I will probably have to cut one more for my daughter for Christmas.


Finished Advent Calender

This is another Midnight Madness project. I think people who choose to do it, didn't believe me when I said it was very time consuming. They believe me now.

Website is HERE that has the instructions


I did a more Christ centered version and included a scripture in each mini box. Look at past posts for a close-up of it opened. The stamp was gotten from I brake for Stamps.

Midnight Madness

The woman's organization at my church has a special meeting once of year. We have dinner and a bunch of crafts. It runs from 6 to midnight and is a bit of madness. This year we also had a presentation on preparedness since 60 homes were lost in a fire here this year. I was in charge of a lot of the activities. I did the sample for most of the crafts and was in charge of almost all the paper crafts.  Here are the wood crafts I did samples of and my friend Maria took charge of cutting wood and helping people that night.


I got this idea from Pinterest. Here is the BLOG She did not give sizes.. I did it at six and seven inches with the heads of Mary and Joseph being 1 1/2 inch balls. Baby Jesus was 1 inch.  I used a brown wash on Joseph and blue was on Mary. 

This was also a project from Pinterest.  Here is the BLOG.  I added more feathers than the original. The feathers are Jumbo craft sticks covered with scrapbook paper. The square is a 3 1/2 in square of 2 by 4. The head is the end of a paint stick for a 5 gal paint container.  The beak and waddle are paper and the eyes were done with black paint and a Q-tip. The base paint was brown. 

I have additional project that I will post in separate posts.


.

Monday, October 8, 2012

Advent Calender in progress

I am so excited about this that I have to share it before it is even done.  I found this calender on Pinterest.  Here is a picture. You can learn more at http://qbeesquest.blogspot.com/2011/10/inch-box-advent-calendar-tutorial.html  She did a great step by step.

Here is mine in progress. I am taking a more spiritual version. I am going to put scriptures in each of my boxes. They are only one inch square. 


I will show it again when it is finished but I was so pleased, I wanted to share. It is not an easy project. Took me several hours to build the box

Sunday, September 30, 2012

Cards from a Previous Card Class

I am behind on posting cards to my blog from my card classes. Here are the ones we did two weeks ago.  The theme was Paper Tole or 3D decoupage. Two of the cards came from http://www.craftsuprint.com


This one was called Looking out at Christmas decoupage card front  Here is a closeup of the layers.

This is another one from CraftUPrint.  It was called "Frosty Screen Card"

The third card was not decoupage.  It was a tissue technique we did earlier and a class member suggested a Christmas card with the same technique. Here is the design I came up with.


The snowflake die is from Memory Box. Instructions for the technique can be found at http://www.youtube.com/watch?v=Noc694n4C4A

The Technique is a little tricky to get the right hand that leaves you with resist and doesn't tear.  Be patient if yo try it.

Wish you could all come to class!

Thursday, September 27, 2012

Owl Treat Holders

These are so cute. I love them but wish the photos were better.  Well, here are the first ones I made.

I saw them on Pintrest. Here is the link.  http://www.kerryspapercrafts.com/?p=3924

The pattern called for a 3/4 inch circle punch for the feathers but I couldn't find one so I used a 1 inch.  I like it with the one inch circles and won't look for the smaller punch. I also learned that the owl looks better with the eyes a little lower. See the light blue one, it looks better. with the lower eyes.
Here are some close ups.


The supplies:
Pillow box die
12 one inch circles in decorator paper
2 large oval for wings
2  1 1/4  white circles
2  3/4 black circles
3 yellow hearts for feet and beaks
2 wiggly eyes
(and a treat to put inside!)

Try one! Sooo easy!

Wednesday, September 26, 2012

Pop up Bouquet of Flowers

This type of pop up is a 7 flower pop up.  If you look it up on google, you will find lots of different ones. I did buy this one from http://www.craftsuprint.com/  It is called Floral Splendour.  I designed my own front of the card.
The stamps are from Stampin Up. I colored the flower with a Copic marker. I inked the edges with Distress Ink. 
And inside! 

Isn't it amazing?!? How does that fit inside a card! Here is another view and a close up of the words. The words are a Stampin Up stamp as well.

I wish you could have all been at class and play with us. It was so much fun making pop up cards.

Tissue Box Pop up

This one I saw a long time ago and is very easy.
The front looks like this.
The words are a stamp from Stampabilities. The lace is a EK Success punch.  There is also some design paper on the front.
and inside:

I altered the original but here is the video on making something like this. I used the word strip punch from Stampin Up to do the slit for the tissue. 
Come back to see the final pop up card from the card class.