Have a look at this website for some Christmas Freebies.
http://countdown.tentwostudios.com

Tuesday, December 13, 2011
Sunday, November 20, 2011
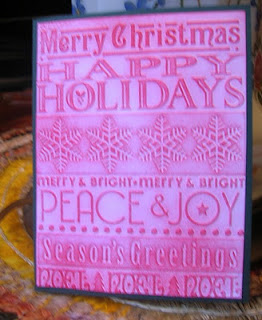
Simple Christmas Cards
I taught a recent card making class and we did 5 simple Christmas cards. Here they are. Maybe they will inspire you.


 Hope you are having fun getting ready for Christmas


Tuesday, October 18, 2011
Manly Birthday Cards
I am sooo behind on blogging and really tired of my work taking my whole life. Rumor has it that I will have an easier time in November and December. I am looking forward to it. So here are the cards we did at one of my prior card making classes. We are still having classes at my house about every other week.

 All of these stamps are from garage sales. The car set is my Stampin Up. The other was an unmounted stamp. I don't know who makes it. There are different colors of distress ink on each card.


Wednesday, August 31, 2011
Spellbinders Bird Die
Aren't these cool? I saw on Becca's blog that she did a pop up card with this die. Check it out here http://www.amazingpapergrace.com/birdcage-popup-card-and-giftbox-part/ It is amazing. This is on my wish list so I can make one too! What do you think?
Monday, August 29, 2011
Pop up wedding card


Thursday, August 25, 2011
Soot Class
I have a card class today. I am teaching the soot technique.

For the card here, the tree is an older stamp from Rubber Stampede. The pumpkins came from a scarecrow stamp from I Brake For Stamps. The embossed background is from Cuttlebug. The buttons were an embosslet from Stampin Up

It is like another one I did a couple years ago. The technique is fun but a little challenging. The idea is that you hold a paper over a flame and get soot on it. Then you stamp your image with no ink. This lifts the soot off , Finally you seal it. I have learned the following hints from doing this before.
- I didn't have any luck with photo paper. I have really loved using the Ultra Glossy cardstock from Paper Temptress.
- Use a taper candle rather than a pillar.
- Get the paper right down in the flame, pretty close to the wick.
For the card here, the tree is an older stamp from Rubber Stampede. The pumpkins came from a scarecrow stamp from I Brake For Stamps. The embossed background is from Cuttlebug. The buttons were an embosslet from Stampin Up
Saturday, August 20, 2011
Marvelous Magicial Marque Card
I saw this video and just had to try it. I have made 3 cards. Two very much like the original but one a little different. So here is the link to the video.Marvelous Magical Marque Card . The card is pretty easy to do once you have it down.
Here is the first one
 You will have to see the video to really understand how it works. Next is a picture party opened.
 The center of the flower is the inside of the card and it slides open to reveal words.
 Isn't that fun!
Here is another.
 And then I decided to try something a little different.
Inside it works just like the others.
 The punches are all Stampin Up. Papers are from Chester and from a set I got when Books are Fun came to work. Try one of these. The are suprisingly easy and super fun.
Here is the first one


Here is another.


Inside it works just like the others.

Lots of cards this weekend
I have been doing lots of cards this weekend.I am hoping to be able to sell some at work to stretch my budget. Here is one of my creations. This card opens in the center. It was actually was a mistake where I turned lemons into lemonade.
 The giant flower by Prima. The center brad was by K&Company. I got both at Tuesday Morning. The better was in a boxed set from Michaels by Cheater. The little border down the center is done with a Stampin Up punch. Quick, pretty and turned a mistake into a nice card!

Sunday, August 14, 2011
Coloring Class
I taught a couple coloring classes in my home this week. I am not an expert but I shared what I know. We did three cards with three different techniques. The cards themselves are pretty simple so the emphasis could be on the coloring itself.
The first was using water color pencils.
 This stamp is by D. Morgan. I love these stamps but I am abscessed with beach stamps. Watercolor pencils are great because they are fairly inexpensive. Typically, they are light color. Usually when I color with water color pencils, I outline the area, and any detail lines, then spread the color with a paint brush. The basics are pretty easy for any skill level but you can grow and improve with practice.
The second card was done with odorless mineral spirits (OMS) and colored pencils. It is important that the colored pencils are waxed based but luckily most are. In this technique, you color the picture with colored pencils. You don't have to use a lot of color or create a smooth image because once your are you use a nub dipped in OMS and blend the colors. It makes the colored pencil much bolder colors and smooths & blends the coloring. It is kind of amazing how wonderful it can be. I think I will do a post with a before blended and after blended pictures. It's a great inexpensive technique with amazing results.

The final card was done with Copics. I used E00, E11, E02, R83, RV34, YG63, YG67, Y11, Y15, C1. I love my Copics because they bend so well. I also love the skin tons you can get from Copics. There are some amazing tutorials online already so I will not spend much time on this technique here.
 I had a total of 9 people come to the classes. I am offering a Soot class latter this month. I am going to try and teach more classes in the future. If you have questions about these techniques, feel free to ask. If I don't have an answer, I may be able to point you in the right direction.
The first was using water color pencils.

The second card was done with odorless mineral spirits (OMS) and colored pencils. It is important that the colored pencils are waxed based but luckily most are. In this technique, you color the picture with colored pencils. You don't have to use a lot of color or create a smooth image because once your are you use a nub dipped in OMS and blend the colors. It makes the colored pencil much bolder colors and smooths & blends the coloring. It is kind of amazing how wonderful it can be. I think I will do a post with a before blended and after blended pictures. It's a great inexpensive technique with amazing results.

The final card was done with Copics. I used E00, E11, E02, R83, RV34, YG63, YG67, Y11, Y15, C1. I love my Copics because they bend so well. I also love the skin tons you can get from Copics. There are some amazing tutorials online already so I will not spend much time on this technique here.

Friday, August 12, 2011
Wild flowers
Here is another card I did while on vacation. I love this stamp. I got it at I Brake for Stamps. I colored it with Copics. I took the picture of the card in Michigan on vacation so I didn't have my usual lights.


Almost stain glass flowers
I colored this image while on vacation and put it together when I got home. I colored it with Copic markers. The stamp came from I Brake for Stamps. I have had the stamp for a while and not used it Sometimes unmounted stamps are hard to tell how wonderful they will be until you use them. Just loved with one once I got it colored. I cut the circles with Nestibilities dies. The background was done with an embossing folder. I can't remember if it was a Tim Holtz one or a by someone else.


Thursday, August 11, 2011
Celebrate with a cupcake.
I was working on card to use for a class. I started this one and I decided this one would be too hard for the class. I decided to finish it anyway. I don't have many hÄnglar and stÄnglar stamps but really love coloring them. Isn't this little chef cool. I colored it with Copics. The word stamp is from Stampin Up.


Wednesday, August 10, 2011
Playing with my Cricut
I am still learning to use my Cricut. I got a Winne the Pooh cartridge for a bargain at JoAnn Fabrics. Here is one of the first things I cut from it. The butterfly is a sticker.. I punched the cupcake border.

The cute buggy background helps make it a pretty adorable card!

The cute buggy background helps make it a pretty adorable card!
Wednesday, July 13, 2011
Thank You Snoopy
When I flew into St Louis to start my vacation, I was able to meet Snoopy from JustCards for lunch. She gave me this wonderful Stampscapes stamp from a store she shops at. Her daughters helped her go through my blog and group to see what I already had so they could get me something new. Aren't they wonderful!! I don't have a ton of supplies with me here at the cottages in Michigan but I colored this with copic markers and then used Colorbox cat eye chalks to shade the edges.
I don't have the same lights here to take the picture. Hope the colors show up okay.

Thank you so much Snoopy!
I don't have the same lights here to take the picture. Hope the colors show up okay.

Thank you so much Snoopy!
Sunday, July 10, 2011
Summer Card
Don't tell my swap partner! I just couldn't wait to show this card. I made it while visiting our family place in Michigan. I got the seascape paper at Prairie Arts in Springfield IL. It was in the clearance bin. The die cuts are done with a Cuttlebug Die. Looks pretty great on the beach if I say so myself!


Saturday, June 18, 2011
Encastic art - Melted Crayon technique
I had fun trying this technique . Below is the video I used.
http://www.youtube.com/watch?
The technique involves melting crayons on a craft iron ( no holes please) and swiping them on paper. Great way to use up bits and pieces of broken crayons.
 Here is the first background I did. I was so proud of this first try. I used photo paper.
Below is my second try....

It is smoother. Same colors as the first. Then I have a picture of the card I did with the second background. It was really difficult to stamp on it.
 Finally I tried an ocean scene.

The boat is from Stampin Up
http://www.youtube.com/watch?
The technique involves melting crayons on a craft iron ( no holes please) and swiping them on paper. Great way to use up bits and pieces of broken crayons.

Below is my second try....

It is smoother. Same colors as the first. Then I have a picture of the card I did with the second background. It was really difficult to stamp on it.


The boat is from Stampin Up
Wednesday, April 27, 2011
Sympathy Card
My best friend's father died Monday night and I made this card for her.
 It is a simple card since I have family visiting and very little time. The flower was put together from several sets.

Tuesday, April 26, 2011
A few prior cards
I made sooo many cards for the Tsunami relief ( about 100 sold) that I have lost track of what cards I have shown and what I haven't I will post a couple here that I don't think I have shown. These are a few masculine cards.


Happy cardmaking!


Happy cardmaking!
Monday, April 18, 2011
Tuesday, April 12, 2011
The fifth March of Dimes card
Here is the 5th card. I stayed up late to get it done. The scan is a little crooked. I finally returned Matthew's camera to him. I have had it for a long time to take pictures of cards. I will be using the scanner for a while. Now off to bed. I have to get up early and head off to work!


All the coloring except the pink in the ears was done with Copics. I just love how they blend. The stamp is from hÄnglar and stÄnglar.
Cards for March of Dimes
I did a set of card for an auction for March of Dimes. Farmers Insurance is a big supporter of March of Dimes. I did 4 card for it tonight. I also have some mini candy bars decorated. If I have time I will make a 5th card in the morning. I used the same paper on the background of them to make them look like a set. What do you think?


Sunday, April 10, 2011
An Easter boy

Here is the boy hÄnglar and stÄnglar stamp. I colored him just not to try and relax before bed. Big week at work so I doubt there will be any addition cards done this week. I did about 7 this weekend for the tsunami fund. This is colored with Copics. I didn't have all the exact colors I wanted but Copics blend so well, you can hardly tell. Easter Hugs to all my followers!
Another Easter card

I think this hÄnglar and stÄnglar stamp is so adorable. I love her! I colored her with Copics.
Monday, March 28, 2011
Easter Cards
I have been doing a lot of Easter cards while working on the relief fund. I even borrowed stamps from a couple people Here are some of the recent cards. Let me know if you have questions about making them.


How about a rabbit of a different color! )

Up to $166 today for the fund. Didn't have time to try and sell many.
Canada Swap
This is the card I did for the Canada swap for Inkyfunstampers. Since my partner finally got the card, I thought I would share it here. The moose stamp is one of my favorites. I really don't know who makes the stamp but I have seen a couple people carry it. Search Alaska stamps ( since that is the collection it is in) and then look for the moose


I colored with Copics as usual. The embossed background was done with a Tim Holtz embossing folder. I used vintage photo distress ink to highlight the texture of the paper after it was embossed.
Sunday, March 27, 2011
The tsunami of cards continues.....

I did some more owls. People from church took 7 of my cards today. I haven't gotten the money but it will be another $21 and brings the total to $160.

This is based off some very cool paper.


Subscribe to:
Posts (Atom)